http://sharepoint.microsoft.com/Blogs/GetThePoint/Lists/Posts/Post.aspx?ID=462
and
http://veerareddykolan.blogspot.in/2011/01/sharepoint-2010-document-sets.html


Thanks Micheal for the article
- Additional Information on grouped content
- Ability to assign default metadata
- Synchronization of metadata
- Versioning of all content
- Versioning of individual content
- Running workflows on multiple items with SharePoint Designer:
- Provisioning of default content
- Records Management portability
Additional Information on grouped content
A common request is to be able to provide additional information on a
collection of documents. Utilizing folders, this is commonly manifested
by creating folders with a descriptive name, for instance RFP Proposal
or Project Submissions. However, what if more than a single piece of
information is necessary?
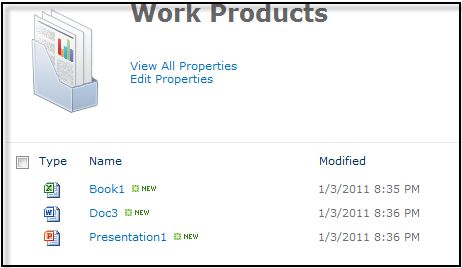
Document Sets provide a customizable Welcome Page that can contain
additional Web Parts, metadata and other information that relates to the
collection of content stored within. This Welcome Page is configurable
per Document Set type defined, so that different Document Set templates
can have their own unique Welcome Page.

In addition to allowing Web Parts, the Welcome Page can contain many different types of information. For instance, Welcome Page Columns expose the metadata relating to the set of content that resides within the set so that it can be easily seen.

The Welcome Page provides users with far more information than a
folder name ever could. Users can simply navigate to a set and quickly
ascertain not only the content stored within, but also the context with
which the content is associated.
Ability to assign default metadata
The ability to assign default metadata automatically is a new feature
in SharePoint 2010. Put simply this is the ability for SharePoint to
automatically assign metadata to an item when it is created or uploaded
to a document library. This is a great way to start attaching metadata
to your content since once it is defined user do not have to do this
process manually - it will happen automatically.
Using Folders we can now specify default metadata on a per-folder
basis using the new Column Default Value Settings configuration option
available in the Document Library Settings:

With Document Sets you can achieve the same result but in a slightly
different way. First you define a piece of metadata as a Shared Column
and then set the default value on the Document Set. From then on all
content that is uploaded or created in the Document Set will inherit the
Shared Column values:

Shared Columns in Document Sets allow the ability to both share and
synchronize metadata across a collection of content. So both are
achievable by utilizing Folders or Document Sets; however, the
implementation differs slightly.
Synchronization of metadata
The ability to synchronize metadata allows users to change metadata
on multiple items at once within a collection of content. Frequently
users will want to do a bulk change of metadata stored within a folder.
The most common way to achieve this using Folders is by utilizing the
Datasheet View for document libraries, which allows users to bulk change
properties quickly. However, this can be error prone and has
limitations, such as the inability to change Managed Metadata fields.
In contrast, Document Sets allow the ability to configure a column as
a Shared Column. Shared Columns then share metadata across the entire
Document Set. By changing the column value at the document set, all
content contained within the Document Set will be updated with the new
value without the user manually having to change each individual
document. Another advantage is that all columns types are supported, so
users can also easily change Managed Metadata columns for all content as
well.

Versioning of individual documents
The versioning of individual documents brings joy and happiness to
many an end user. This is of course available by using versioning on
documents contained within Folders.
Fortunately Document Sets also allow the versioning of individual
content in exactly the same way, providing a familiar interface to
users.

Versioning of all content
Continuing on from versioning individual documents, another frequent
requirement is the ability to capture a version of ALL documents within a
container. The vast majority of business processes consist of more than
one document or artifact that goes through a process. Imagine a RFP
submission that consists of multiple documents, for example. Although it
is very powerful to be able to version individual documents, it is even
more relevant if we can take a version of all documents that make up
the submission. This allows users to say 'At this point in time all the
content within the submission was at this stage'.
With Folders, this is difficult at best. Unless a user manually
writes down and stores a version of all the contents within the folder,
then this is virtually impossible.
However, Document Sets fully support the versioning of all content
within a set. Users can easily take a snapshot of all the documents with
some additional options such as only capturing the latest major version
or any version of a document that is contained:

If you look at the version history for the Document Set you will be
able to see all of the properties and contents stored within:

For me this is one of the most compelling reasons to use Document
Sets. The ability to easily create a version of multiple documents can
be leveraged in nearly every business process or task.
Running workflows on multiple items with SharePoint Designer:
Running workflows on multiple items is another commonly asked for
requirement in many organizations. The ability to send multiple items
through an approval process is something that commonly appears on a list
of requirements when organizations are implementing SharePoint.
With folders there is really no other option than to manually start
an Approval process on each item. Unfortunately even though you can now
select multiple items to perform actions on within Lists and Libraries,
you cannot do this with workflows. If you have ten documents that you
need to send through an Approval process, then it's a rather laborious
process. Of course you can create custom workflows in .NET code to solve
this issue and it's a good example of where the new Site Workflow type
may be used. However, if we are limiting ourselves to out-of-the-box or
SharePoint Designer declarative workflows then we are out of luck.
With Document Sets we have new Workflow Actions available in
SharePoint Designer 2010. This means that we can indeed send an entire
Document Set through an Approval Process. Since a Document Set includes
multiple documents, we are in effect sending multiple items through an
approval process as we can see below:

There are also other actions that we can perform on Document Sets
with SharePoint Designer such as capturing a version or sending a
Document Set to a repository.
Provisioning of default content
The ability to create a template and have this reused when a user is
creating a document is commonly used in SharePoint. The power of Content
Types within the platform can be harnessed very effectively to create
these templates and deploy them across multiple sites. However, often we
don't require just a single document to be created, but rather a
collection of documents to be provisioned. For example consider a
project submission pack or a RFP Response that consists of multiple
documents.
In an ideal world, a user would be able to create collections of
documents quickly and easily. If using the folder approach, you can only
create single documents, one at a time. So if a user wanted to create a
project submission pack then they would create the folder that would
house these documents, and then create each individual Content Type one
at a time. This is obviously a cumbersome approach.

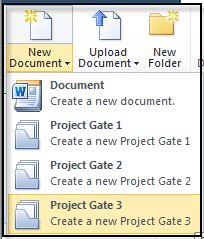
In contrast Document Sets allow us to provision default content when
the Document Set is created. So if we create a RFP Response Document Set
we can choose to have default content created when a user creates the
Document Set:

Now when a user creates a Document Set, not only is the set created but all the default content is provisioned as well!

This is another area where the Document Set excels! Imagine the time
savings across the organization if users can provision sets of content
so quickly and easily.
Records Management portability
It has been well documented about how far the new Records Management
toolset in SharePoint 2010 has progressed. With organizations utilizing
the platform for Records Management the question is often raised if
users can easily declare multiple items as records.
If utilizing a folder approach, then users can now select multiple
items and declare them as records. However the caveat is that this only
applies to utilizing the In-Place records management features. If your
Records Management implementation relies on sending items to the records
center, utilizing a Send To Location, then users will still need to
send each item individually.

Once again Document Sets provide an elegant solution to this problem.
You can now send a Document Set to a Records Centre in one easy click.
All of the content contained within the set will be sent to the Records
Centre. You can now also take advantage of the Content Organizer feature
in SharePoint 2010 to route your Document Sets according to your file
plan.

Permissions
Permissions set at document level are, by default, inherited from the document set itself.

You
can configure permissions on each individual document within the
document set. Sometimes it is necessary to grant access to a document to
a particular user but not all the other documents. That’s the same way
to manage permissions within a document library.
Because there
is a lot of other possibilities, we will just tell that every feature
available at document level is available for document set level. Just
remember that document set is considered as an item.
Conclusion
As you can see there are significant time savings that can be had
when using Document Sets as opposed to folders. Although the familiarity
of folders cannot be questioned, Document Sets provide a similar
experience with far more capabilities. Obviously the question has to be
raised if folders should be used at all in SharePoint 2010 or should
Document Sets be used as the default way to group content. I think that
it would take a brave person to say that folders should not ever be
used, but in my opinion a combination of well-defined metadata, with the
added functionality that Document Sets offer, provide significant
capabilities over a folder only model.
http://www.c-sharpcorner.com/uploadfile/anavijai/how-to-create-content-organizer-rule-in-sharepoint-2010/
Content Organizer Rules :
In this article we will be seeing how to create Content Organizer rule in SharePoint 2010.
SharePoint 2010 introduced a new feature called Content Organizer.
Activate the feature Content Organizer:
- Content Organizer is a site feature.
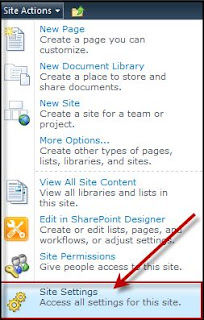
- Go to Site Actions => Site Settings => site Actions =>Manage site features.
- Activate the feature Content Organizer.
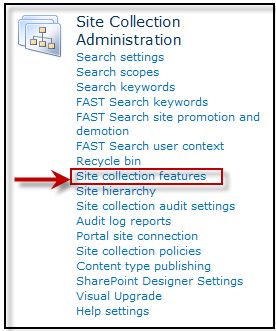
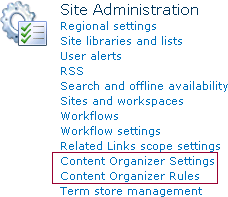
Once you have activated this feature, you will see two options "Content Organizer Settings" and "Content Organizer Rules" in Site Actions => Site Settings => Site Administration.
A new document library "Drop Off Library" also
will be created where you will be adding the documents. Those documents
will be moved to the target document library based on the Content
Organizer rule.
And also a new content type will be created for Content Organizer rule as shown in the following
Content Organizer rule:
- Go to Site Actions => Site Settings => Site Administration => Content Organizer Rules.
- Enter the Rule Name.
- In the Submission's Content Type section select the Content type Group and Type.
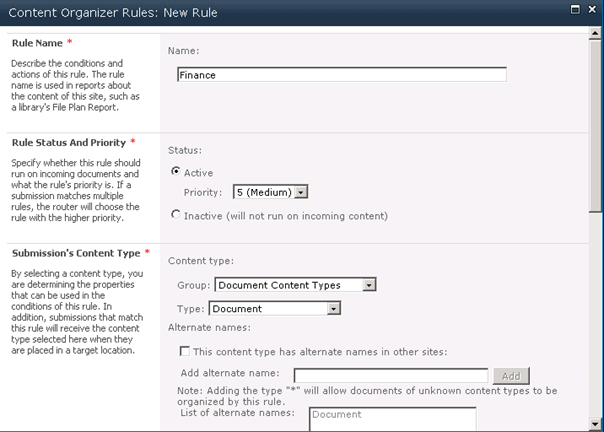
- Set the Property-based conditions for the rule.
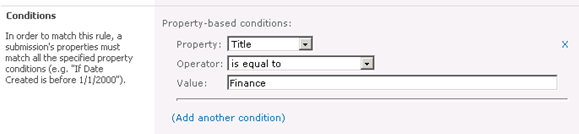
- Select the Target location where you want to save the document based on the rule conditions.
- Click OK.
- A new rule will be created successfully.

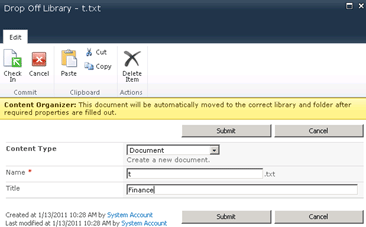
Add a document to the Drop Off Library, and enter the title as Finance.
If the rule condition is satisfied (in my case if "Title is equal to Finance") a message will pop up as shown in the following
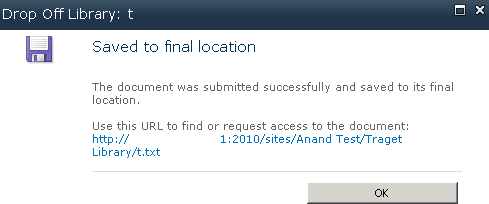
and the document will be saved in the target library.

If the condition is not satisfied a message will pop up as shown in the following
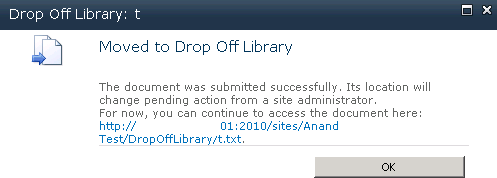
And the document will be added to the drop off library.
No comments:
Post a Comment